TL;DR
- Caulk residue is the thin, sticky film left behind after the old bead is gone — and new caulk will not bond properly over it, so it has to come off completely.
- Start mechanical: a plastic scraper or plastic razor blade removes most residue without scratching. Then match the solvent to the caulk type and the surface.
- Silicone residue: mineral spirits or a commercial silicone remover on tile, glass, and metal; rubbing alcohol for the final wipe. Latex/acrylic residue: warm soapy water or rubbing alcohol is usually enough.
- Never use acetone on acrylic or fiberglass tubs, never use vinegar or citrus cleaners on marble, travertine, or limestone, and never use mineral spirits on painted surfaces.
- Always test any solvent on a hidden spot first, work with ventilation, wear nitrile gloves and eye protection, and let the joint dry fully before recaulking.
You pulled the old caulk out, and the joint looks almost clean — except for a thin, hazy film clinging to the tile and tub. That film is caulk residue, and it is the part most people skip. Skipping it is also why fresh caulk sometimes peels away within weeks: new sealant bonds to surfaces, not to a layer of old sealant. If the surface still feels slick, tacky, or slightly rubbery, it is not ready for a new bead.
The good news is that residue removal is mostly patience, not force. No solvent truly dissolves cured silicone on contact — what solvents do is soften and loosen it so a scraper can lift it. The trick is picking the right solvent for your caulk type and your surface, because the product that works beautifully on glazed tile can ruin an acrylic tub or etch a marble threshold.
If the old bead itself is still in place, deal with that first — see our guide on how to remove old caulk cleanly before you recaulk. This article picks up where that one ends: the bead is out, and only the residue remains.
First, Identify Your Caulk Type
Residue removal goes much faster when you know what you are removing. Most household caulk is one of two types:
Silicone caulk is rubbery, flexible, and slightly stretchy even when old. It is the standard choice around tubs, showers, and sinks because it resists water. Silicone residue feels slick and rubbery, and water beads on it. It does not dissolve in water, which is why scrubbing with soap alone barely touches it.
Latex or acrylic caulk (often labeled “siliconized acrylic”) is firmer and more paintable, and it is common around windows, trim, and baseboards, and sometimes in dry bathroom areas. Its residue feels chalkier and less rubbery, and it softens with warm water and soap.
Not sure which you have? Try the water test on a small patch: rub the residue with a rag dampened in warm, soapy water. If it softens and rolls up, it is latex/acrylic. If it ignores the water completely, it is silicone. When in doubt, treat it as silicone — the silicone-safe methods below are gentle enough for most surfaces, and they work on latex residue too.
Tools and Safety
You do not need specialty equipment, but the right tools make the difference between a clean joint and a scratched tub:
- Plastic scraper or plastic razor blades (your main residue tool — metal blades scratch acrylic, fiberglass, and polished tile)
- Utility knife or caulk removal tool, for any thicker chunks still hanging on
- Non-abrasive scouring pad or nylon scrub pad
- Clean rags or microfiber cloths
- Rubbing alcohol (isopropyl alcohol, 70% or higher)
- Mineral spirits (for silicone residue on hard, non-porous surfaces)
- A commercial silicone caulk remover (optional, but helpful on stubborn silicone film)
- Hair dryer (optional, for heat-softening)
- Painter’s tape and a drop cloth, to protect nearby surfaces
- Nitrile gloves and eye protection
A note on safety, because solvents deserve respect: work with the bathroom fan on or a window open — mineral spirits and commercial removers give off fumes you should not breathe in a closed room. Wear nitrile gloves (latex gloves can degrade with solvents) and eye protection, especially when scraping overhead. Never mix solvents or cleaners, and never use a solvent near an open flame — mineral spirits are flammable. If a solvent contacts your eyes or is swallowed, call Poison Control at 1-800-222-1222 in the US. Always read the product label before use, and follow its dwell times and warnings — they override any general advice here.
One rule applies to every method below: test first. Dab your chosen solvent on a hidden spot (behind the toilet, inside a closet-side joint) and wait a few minutes. If the surface discolors, dulls, or softens, stop and switch to a gentler option.
Step-by-Step: Removing Caulk Residue
Step 1: Clear the loose stuff
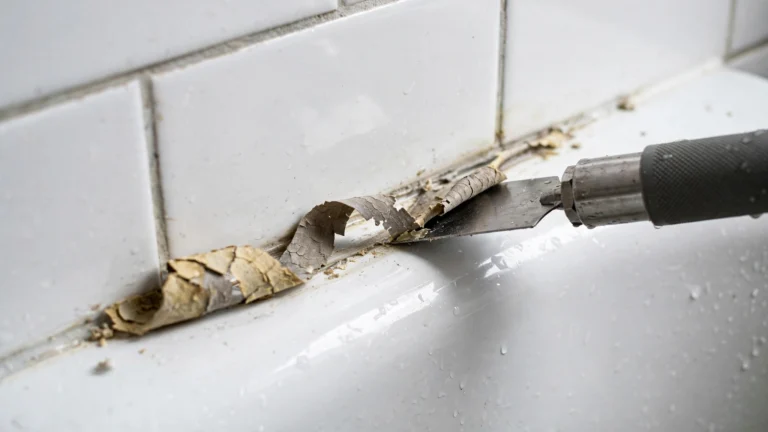
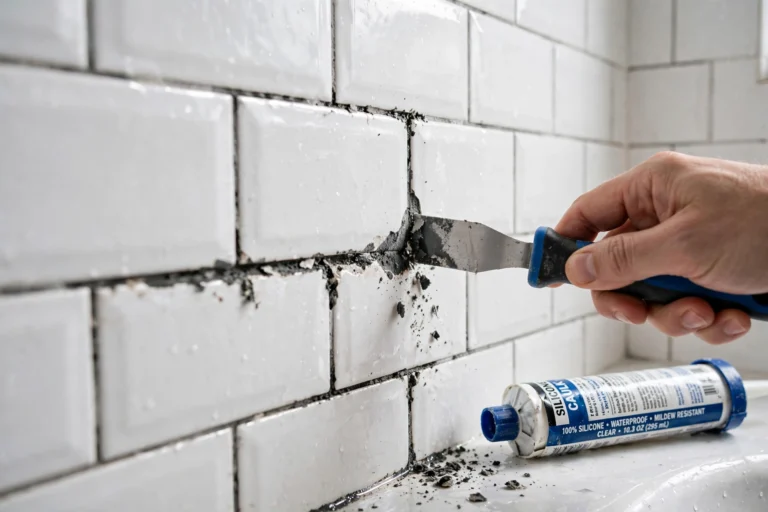
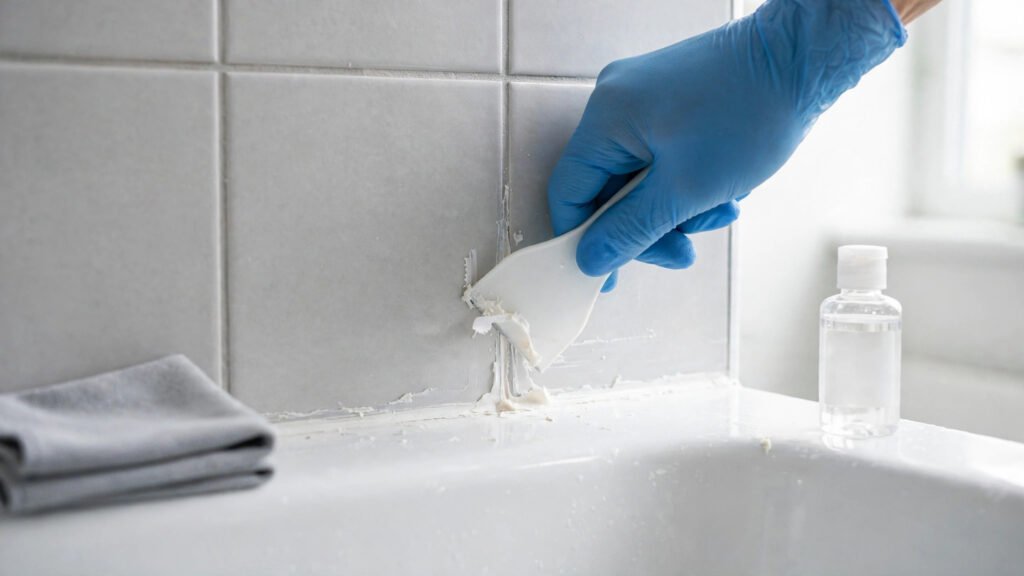
Scrape the joint with a plastic scraper or plastic razor blade held at a low angle. Work in short strokes along the joint, not across it, and wipe the blade on a rag often. This mechanical pass alone removes most visible residue on smooth tile and glass. Avoid metal scrapers and steel wool on tubs, acrylic surrounds, and polished tile — scratches are permanent, and residue is not worth that trade.
Step 2: Soften what remains
Dampen a rag or pad with the solvent that matches your caulk and surface (see the surface guide below), and lay it on the residue for 10–30 minutes. For a stubborn silicone film, a commercial silicone remover left to dwell per its label — often 30 minutes to a few hours — works better than a quick wipe. Patience here is the whole job: softened residue lifts off; dry residue just smears around.
Heat is another softener. A hair dryer on low, passed over the residue for 20–30 seconds at a time, makes old silicone more pliable so it scrapes off in longer pieces. Keep the dryer moving and the heat low — and skip heat entirely on acrylic and fiberglass, which can warp or melt.
Step 3: Scrape and wipe in sections
Work in sections of about 12 inches at a time. Scrape the softened residue, then wipe the section with a solvent-dampened rag, then move on. Check your progress from different angles and with raking light — residue hides in grout lines and along the tub edge, and a film you cannot see in overhead light will still block adhesion.
Step 4: The final wipe
Once the surface looks clean, wipe the entire joint with rubbing alcohol on a clean cloth. This removes solvent oils, soap film, and the last invisible traces. This step matters more than it looks: silicone sealant will not bond to a surface carrying soap residue or solvent oil, so a joint that looks clean but was never alcohol-wiped can still reject new caulk.
Step 5: Let it dry completely
Let the joint dry fully before recaulking — several hours at minimum, and ideally 12–24 hours for a shower or tub joint. Moisture trapped under fresh caulk causes poor adhesion and mold growth behind the bead. If you are recaulking a shower, plan the job so the shower stays dry overnight.
The Right Method for Each Surface
This is where most damage happens — not from the residue, but from the wrong solvent on the wrong surface.
Glazed ceramic and porcelain tile. The most forgiving surfaces. Mineral spirits on a non-abrasive pad, a commercial silicone remover, or rubbing alcohol all work. Test first on polished or crackled glazes, and keep acids away from colored grout unless you know the grout tolerates them.
Glass shower doors and panels. A razor blade in a holder, used flat and wet, lifts residue cleanly; follow with mineral spirits or rubbing alcohol. Never use a dry razor on dry glass, and never use abrasive pads, which haze the surface.
Acrylic and fiberglass tubs and surrounds. The most damage-prone surfaces in the bathroom. Use only a plastic scraper and rubbing alcohol. Never use acetone (nail polish remover) — it can dissolve and cloud acrylic. Never use a heat gun or high heat — acrylic warps. Never use abrasive pads or metal blades. If residue resists, give rubbing alcohol more dwell time rather than reaching for a stronger solvent.
Natural stone: marble, travertine, limestone, onyx. Acids are the enemy here — vinegar, citrus solvents, and many “natural” degreasers etch calcium-based stone on contact, leaving dull patches that only professional polishing fixes. Use pH-neutral cleaners and rubbing alcohol, test on a hidden area, and keep mineral spirits off honed finishes unless a test spot proves safe. Granite and engineered quartz are more forgiving, but the test-first rule still applies.
Painted walls, trim, and finished wood. Rubbing alcohol on a soft cloth, dabbed and lifted rather than scrubbed, is the safe choice. Mineral spirits strip latex paint, and acetone attacks lacquer and varnish. On finished wood, avoid soaking the surface — excess liquid swells wood and raises grain.
Laminate and solid-surface counters. Rubbing alcohol and a plastic scraper are safe on laminate; acetone will fog or bubble it. On solid surfaces such as Corian, mineral spirits and rubbing alcohol are both generally safe — but avoid products containing methylene chloride.
Metal fixtures and trim. Mineral spirits, rubbing alcohol, and even a light application of WD-40 all work on chrome and stainless steel. Wipe dry afterward so no solvent film remains to interfere with new sealant.
What NOT to Do
- Do not use acetone on acrylic, fiberglass, laminate, or painted surfaces. It is excellent at dissolving residue and equally good at dissolving the surface underneath.
- Do not use vinegar or citrus cleaners on natural stone. Acid etching on marble or travertine is not a stain you can wipe away — it is physical damage to the stone.
- Do not use mineral spirits on painted surfaces or finished wood. It strips paint and can lift finishes.
- Do not use sandpaper on silicone residue. Silicone gums up abrasive paper almost instantly, and you will scratch the surface long before you remove the film.
- Do not use a metal scraper on a tub, acrylic surround, or polished tile. One careless stroke leaves a permanent scratch.
- Do not use a heat gun on fiberglass or acrylic. A hair dryer on low is the ceiling for heat on these materials, and even that needs a light touch.
- Do not recaulk over residue “just this once.” The new bead may look fine for a week and then peel in sheets, and you will be doing the whole job again — this time with two layers of residue to remove.
Fresh Smears vs. Cured Residue
Not all residue is old. If you just applied caulk and smeared some where it does not belong, do not reach for a wet rag — fresh silicone is not water-soluble, and wiping it wet spreads it into a thin, wide smear that is harder to remove than the original blob. Instead, let fresh silicone smears cure, or lift them with a dry rag dampened in mineral spirits (on a safe surface) or rubbing alcohol. For fresh latex caulk, the opposite is true: a damp rag right away wipes it up easily, because latex is water-soluble until it cures. Knowing which kind you smeared saves a lot of scrubbing.
How to Tell the Joint Is Ready for New Caulk
Before you open a new tube, run three quick checks:
- The fingertip test. Run a dry fingertip along the joint. It should feel like clean tile or tub — smooth, with no tacky, rubbery, or slick patches.
- The rag test. Wipe the joint with a white rag dampened in rubbing alcohol. If the rag picks up gray, yellow, or rubbery bits, there is still residue — repeat the soften-and-scrape pass on those spots.
- The water test. Sprinkle a few drops of water on the joint. On a truly clean surface, water spreads and sheets; on silicone residue, it beads up and rolls off. Beading means residue remains.
Once all three pass, the joint is ready. If the surrounding grout is cracked or missing as well, that is a separate repair — see our guide on cracked shower grout repair — and for a full floor refresh, our weekend bathroom floor regrouting guide covers the whole job.
Frequently Asked Questions
Does vinegar remove silicone caulk residue? Only slightly, and only on surfaces that tolerate acid. White vinegar can soften cured silicone a little on glazed ceramic, but it is weak compared to mineral spirits or a commercial remover — and it must never be used on marble, travertine, limestone, or other natural stone, where it causes etching.
Can I use Goo Gone or a citrus remover on caulk residue? Citrus-based removers can help on tile, glass, and metal, but check the label for your surface first. Citrus solvents are acidic, so keep them off natural stone, and test them on plastics and painted surfaces before committing to a whole joint.
How long does it take to remove caulk residue? For a standard tub surround, expect 30–60 minutes of active work plus dwell time for the solvent (10 minutes to a few hours for stubborn silicone). The job goes faster if you let the solvent do the work instead of scrubbing harder.
Do I really have to remove every trace before recaulking? Yes. New silicone bonds to the surface, not to old silicone. Even a thin invisible film acts as a bond-breaker, and the new bead will peel away from those spots. The fingertip, rag, and water tests above are how you confirm the surface is truly clean.
Why did my new caulk peel off? The most common causes are residue left under the new bead, a joint that was not fully dry, or soap/solvent film that was never wiped off with rubbing alcohol. All three are preventable with the steps in this guide.
What is the safest residue remover for a fiberglass tub? Rubbing alcohol and a plastic scraper, with patience. Avoid acetone, abrasive pads, metal blades, and heat guns on fiberglass entirely.
Sources & Further Reading
- GE Sealants, Silicone Technical Data Sheet — manufacturer guidance on removing cured sealant, including surface-by-surface solvent recommendations (mineral spirits on tile and marble, rubbing alcohol on plastics and painted surfaces, test-first warnings).
- Product labels for commercial silicone caulk removers and mineral spirits — dwell times, ventilation requirements, and surface warnings vary by product and override general advice.
- U.S. Consumer Product Safety Commission guidance on household solvents — ventilation and skin protection when using mineral spirits and similar solvents.
- Poison Control (US): 1-800-222-1222 — for solvent exposure emergencies.
This guide is for general home-maintenance information. Always follow the label instructions of any solvent or remover you use, test on a hidden area first, and stop if a surface reacts. If residue covers a large area, involves damaged stone, or sits behind a leaking fixture, a professional can assess whether the joint or substrate needs repair first.